How to Change a WordPress Theme Without Breaking Your Site


Disclosure: This post contains affiliate links. If you buy through one of them, we may earn a commission at no extra cost to you. We only recommend tools we’d genuinely suggest to a friend.
How-To Guide
To change a WordPress theme without breaking your site, back up your full site, then test the new theme on a staging copy. Save your custom CSS and code snippets first. Activate the theme only after you check menus, widgets, and forms. Your posts and pages stay safe, but layouts and theme-specific features can break.
- Posts, pages, media, and comments live in the WordPress database, so switching themes leaves them in place.
- Additional CSS, your logo, colors, and menu locations are saved per theme, according to the WordPress Developer Reference. Copy them before you switch.
- Widgets from missing widget areas move to Inactive Widgets with their settings intact, per the official WordPress.org widgets documentation.
- WP Staging’s free version clones your site into a subfolder, while pushing staging changes live requires WP Staging Pro. Its WordPress.org listing shows 100,000+ active installations and a 4.8/5 rating as of October 2026.
- WordPress.org recommends PHP 8.3 or greater, so confirm your new theme supports your server’s PHP version before you switch.
Changing your WordPress theme won’t erase your posts, pages, or media. That content lives in your database, not in your theme. What can break is everything the old theme controlled, like menu locations, widget areas, custom CSS, and tracking codes.
That’s why knowing how to change a WordPress theme without breaking your site comes down to preparation. Back up first. Test on staging. Then switch and check your work.
Below, you’ll find what breaks and why, which switching method fits your site, and how to roll back if something goes wrong.
What Changes (and What Doesn’t) When You Switch Themes
Before you touch any settings, it helps to know where WordPress actually stores your stuff. Once you see that split, the risks of a theme switch become easy to predict.
Your database holds posts, pages, comments, users, and plugin settings. Your theme files control layout, styling, and any extra features the theme adds. When you switch themes, the database stays put. That’s why your content survives.
The problems come from settings and features that belong to one specific theme.
Settings That Are Saved Per Theme
Some settings look global but are actually tied to the active theme. The Customizer’s Additional CSS is a good example. According to the WordPress Developer Reference, WordPress fetches custom CSS by theme stylesheet name, so each theme has its own saved CSS.
Customizer options work the same way. Your logo, colors, header layout, and menu location assignments are stored as theme modifications for that theme only. Your new theme starts with its own blank set.
Theme Switch Breakage Map
Use this table to spot what needs attention on your site before you switch.
| Item | Survives the Switch? | What Happens | How to Fix It |
|---|---|---|---|
| Posts, pages, and media | ✓ Yes | Stay in the database and uploads folder | Nothing needed |
| Menus | Partly | Menus remain, but may lose their assigned locations | Reassign them in Appearance → Menus → Manage Locations |
| Widgets | Partly | Moved to Inactive Widgets if the new theme has different areas | Drag them back into the new widget areas |
| Customizer Additional CSS | ✗ No | Stays saved to the old theme; the new theme starts empty | Copy it before switching, then paste it back |
| Logo, colors, header settings | ✗ No | Stored per theme as theme modifications | Set them up again in the new theme |
Code in functions.php or header.php |
✗ No | Analytics tags, verification codes, and snippets stop running | Move them to a code snippets plugin first |
| Theme shortcodes | ✗ No | Show up as raw [shortcode] text on pages |
Replace with blocks or a plugin |
| Theme custom post types (portfolio, testimonials) | Data yes, display no | Entries stay in the database but disappear from the site | Use a plugin that registers the same post type |
| Page builder layouts | Usually | Safe if the builder is a plugin; at risk if it’s built into the theme | Check whether your builder is a separate plugin |
| Featured image sizes | Partly | Old thumbnails may look stretched or cropped | Regenerate thumbnails after switching |
Key Takeaways
- You won’t lose content when you change themes, but anything the old theme controlled needs a backup plan.
- Settings saved to your old theme come back if you reactivate it.
Before You Switch: An 8-Step Pre-Flight Checklist
Now that you know what can break, you can protect each piece before it becomes a problem. Work through these eight steps in order. Most take only a few minutes.
Back Up Your Full Site
Your backup is your safety net. Make sure it includes both your files and your database. A database-only backup won’t restore your old theme files or uploads.
Many hosts include daily backups, but don’t rely on them alone. Create a fresh, on-demand backup right before you switch. A free plugin like UpdraftPlus can send a copy to cloud storage such as Google Drive or Dropbox, according to its WordPress.org plugin page.
Want to compare options first? See our guide to the best WordPress backup plugins.
Record Your Current Load Times
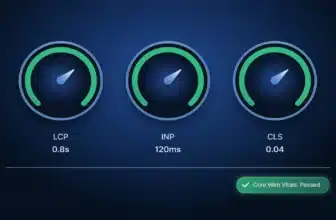
Run your homepage and one key post through Google PageSpeed Insights. Save the scores and Core Web Vitals results. After the switch, you’ll compare them to see if the new theme helped or hurt.
Copy Your Custom CSS and Code
Open Appearance → Customize → Additional CSS and copy everything into a text file. Then check your theme’s functions.php and header.php for code you or a developer added.
Look closely for analytics tags, ad scripts, and site verification codes. Move these into a snippets plugin like Code Snippets. That way, they keep running no matter which theme you use.
Screenshot Your Key Pages
Take full-page screenshots of your homepage, a blog post, your contact page, and any sales pages. These give you a clear reference when you rebuild layouts later. They also help you spot anything missing after the switch.
Inventory Theme-Locked Features
Some themes bundle features that vanish when the theme does. Check for these:
- Shortcodes from the theme, such as buttons, columns, or sliders
- Custom post types like portfolios, testimonials, or team members
- A built-in page builder that isn’t listed under Plugins (see how builder-based setups compare in our Elementor vs. Divi breakdown)
- Bundled premium plugins that came with the theme’s license
For each one, decide on a replacement before you switch. A plugin-based alternative keeps your setup portable for future theme changes.
If your old theme is a premium theme, also deactivate its license in the theme’s settings or your account dashboard. That frees the license for use on another site.
Check PHP Version and Plugin Compatibility
Go to Tools → Site Health to see your current PHP version. As of this writing, WordPress.org recommends PHP 8.3 or greater. Then confirm your new theme supports that version.
For free themes, the WordPress.org theme page lists the required PHP version, the last updated date, and active installations. A theme that hasn’t been updated in over a year is a red flag.
Next, check the theme’s documentation for your critical plugins. Page builders, WooCommerce, and form plugins matter most here.
Note Your Menu and Widget Assignments
Visit Appearance → Menus → Manage Locations and write down which menu sits where. Do the same for Appearance → Widgets. This record makes reassigning everything much faster.
Pick a Low-Traffic Window
Check your analytics for your quietest hours. Plan to push changes live then. If you’re switching directly on your live site, turn on maintenance mode first so visitors don’t see a half-finished design.
Once all eight steps are done, you’re ready to choose how you’ll make the switch.
Which Theme-Switching Method Should You Use?
WordPress gives you several ways to switch themes, and the right one depends on how much traffic and complexity your site has. Here’s how the five common methods compare.
| Method | Best For | Do Visitors See Changes? | Risk Level | Skill Needed |
|---|---|---|---|---|
| Live Preview | Quick look before committing | No, until you activate | Low | Beginner |
| Staging site | Business sites, stores, high-traffic blogs | No, until you push live | Lowest ✓ | Beginner to intermediate |
| Theme Switcha plugin | Admins customizing on a live site without staging | No, only admins see the new theme | Low to medium | Intermediate |
| Direct live switch | Brand-new sites with little content | Yes, right away | High | Beginner |
| Manual (FTP, database, or WP-CLI) | Emergencies when the dashboard won’t load | Yes, right away | Medium to high | Advanced |
Live Preview is useful, but it has a limit. For classic themes, you can’t save your preview changes as a draft. You either activate the theme or lose your tweaks when you leave.
Theme Switcha fills that gap. According to its WordPress.org listing, it lets logged-in admins work with a different theme while regular visitors keep seeing the current one.
Which Method Fits Your Site?
Live Preview, then a direct switch, is usually fine. You can skip staging here, but still take a backup first.
Use a staging site. Rebuilding menus and widgets takes time, and staging hides that work from visitors.
Always use staging. Test the cart, checkout, and account pages before anything goes live.
A network admin must first network-enable the theme under Network Admin → Themes. Individual site admins can activate it after that.
How to Change Your WordPress Theme Safely, Step by Step
The steps below follow the staging approach, since it’s the safest option for most sites. If you’re using Live Preview only, skip straight to Step 2.
The Short Version
- Back up your full site.
- Create a staging copy.
- Install the new theme on staging.
- Preview and configure it.
- Activate it and fix menus, widgets, and CSS.
- Test everything, then push the changes live.
Create a Staging Site
A staging site is a private copy of your live site. You can break things there without any visitor noticing. You have two main ways to create one.
Option A: Your host’s one-click staging. Many managed WordPress hosts include staging in their control panels. It’s usually the easiest route because pushing changes live is built in. See our roundup of WordPress hosts with one-click staging to check whether yours offers it.
Option B: A staging plugin. WP Staging is a popular choice. Its WordPress.org listing shows 100,000+ active installations and a 4.8 out of 5 rating as of October 2026. The free version clones your site into a subfolder, and it can also create full-site backups, so it can cover the backup step too. Pushing staging changes back to your live site is a Pro feature, according to the same listing.
| Tool | WP Staging (WordPress staging & backup plugin) |
|---|---|
| Best For | Sites without host-provided one-click staging |
| Free Version | Yes — clones your site into a subfolder and creates full-site backups |
| Push to Live | Pro only (per WordPress.org listing) |
| Starting Price (Pro) | [PRICE]/year, according to the vendor’s pricing page. Pricing last verified: [DATE]. |
Download WP Staging Free →
Get WP Staging Pro →
Install the New Theme
Log in to your staging site’s dashboard. Go to Appearance → Themes → Add New Theme.
- Free theme: Search the WordPress.org directory by name and click Install.
- Premium theme: Click Upload Theme, choose the ZIP file from the developer, and click Install Now.
Don’t click Activate yet. Installing a theme doesn’t change your site until you activate it.
Preview and Configure It
Hover over the new theme and click Live Preview. What opens depends on the theme type.
- Classic themes open in the Customizer. You can browse your pages and adjust colors, fonts, and layout.
- Block themes open in the Site Editor. You can review templates and styles before activating.
Click through your homepage, a blog post, and your key pages. Compare them with the screenshots you took earlier. Note anything that looks broken.
Activate and Fix the Basics
Click Activate. Then work through your notes from the pre-flight checklist:
- Reassign menus under Appearance → Menus → Manage Locations.
- Move widgets out of the Inactive Widgets area.
- Paste your saved custom CSS into the new theme’s CSS settings.
- Re-upload your logo and site icon.
- Replace any broken theme shortcodes.
Keep your old theme installed for now. You’ll need it if you have to roll back.
Push the Changes Live
Once everything checks out on staging, push it to your live site using your host’s tool or WP Staging Pro.
To stay safe, push only theme files and settings when your tool allows it. Another option is to repeat the switch on your live site, using staging as your rehearsal. With your notes ready, that usually takes minutes, not hours.
Switching From a Classic Theme to a Block Theme
One type of switch needs extra planning. Moving from a classic theme to a block theme changes how you edit your whole site, not just how it looks.
Classic themes use the Customizer and widget areas. Block themes replace both with the Site Editor, found under Appearance → Editor. Headers, footers, and sidebars become editable templates built from blocks.
What Works Differently in a Block Theme
| Feature | Classic Theme | Block Theme |
|---|---|---|
| Site design settings | Appearance → Customize | Appearance → Editor → Styles |
| Header and footer | Theme settings and widget areas | Template parts edited with blocks |
| Sidebars and widgets | Appearance → Widgets | Blocks placed inside templates |
| Menus | Appearance → Menus | Navigation block |
| Custom CSS | Customizer → Additional CSS | Styles panel → Additional CSS |
How to Handle the Move
Rebuild your widgets as blocks. Your old widgets won’t appear in a block theme’s templates on their own. Open the template part for your sidebar or footer and add the matching blocks, such as Search, Latest Posts, or Categories.
Bring your menus over. Your classic menus still exist in the database. The Navigation block documentation explains how to select an existing classic menu inside the block, so you don’t have to rebuild it link by link.
Move your custom CSS. Paste the CSS you saved earlier into the Additional CSS option in the Styles panel. Expect to adjust some selectors, since block themes use different HTML class names.
What to Check After Switching Themes
Your new theme is live, but a quick round of checks catches the problems visitors would otherwise find for you. Work through this list within the first hour after switching.
Clear Your Caches First
Old cached pages can hide problems or make fixes look broken. Purge your caching plugin, your host’s server cache, and your CDN if you use one. Then open your site in a private browser window.
Layout and Navigation
- Compare your homepage, a blog post, and key pages against your screenshots.
- Test menus on desktop and mobile. Mobile menus are easy to miss, so check them separately.
- Confirm your logo, site icon, and footer content appear correctly.
- Search your pages for raw
[shortcode]text left over from the old theme.
Forms, Checkout, and Key Features
- Submit every contact or signup form and confirm the email arrives.
- For WooCommerce stores, run a full test order through cart and checkout. Then open WooCommerce → Status and look for warnings about outdated template files in the new theme. If you’re still shopping for a store theme, see our best WooCommerce themes guide.
- Check that comments, search, and login pages still work.
Images
Each theme registers its own image sizes. Your existing featured images may look stretched or awkwardly cropped as a result. The free Regenerate Thumbnails plugin rebuilds them to match your new theme’s sizes.
SEO and Tracking
- View the page source and confirm your analytics tag still loads.
- Check that title tags and meta descriptions still come from your SEO plugin (see our Rank Math vs. Yoast comparison if you’re reviewing your setup).
- Run a key page through Google’s Rich Results Test to confirm your schema survived.
- Watch Google Search Console over the next two weeks for new crawl errors.
Speed
Run the same pages through PageSpeed Insights that you tested before the switch. Compare the scores side by side. If your new theme is noticeably slower, investigate now, before Google recrawls your site. Heavy demo content, unused theme features, and large hero images are common causes.
How to Roll Back If Something Breaks
Even with careful prep, a switch can go wrong. Maybe a key page breaks or a plugin conflict appears. Rolling back is usually quick if you kept your old theme and your backup.
Option 1: Reactivate Your Old Theme
This is the fastest fix. Go to Appearance → Themes and activate your previous theme. Because WordPress saves Customizer settings, menu locations, and Additional CSS per theme, most of your old setup comes back with it.
Widgets are the main exception. You may need to drag a few back out of the Inactive Widgets area.
Option 2: Restore Your Backup
If reactivating doesn’t fix things, restore the full backup you made before switching. Most backup plugins and hosts offer a one-click restore. Remember that any posts, comments, or orders added after that backup will be lost, so note them before you restore.
Option 3: Switch Themes Without the Dashboard
Sometimes a theme error locks you out of wp-admin completely. First, check your admin email. When a fatal error occurs, WordPress can send the site admin a recovery mode link that lets you log in and deactivate the problem.
If that doesn’t work, use one of these manual methods:
- Via FTP or your host’s file manager: Open
wp-content/themesand rename the new theme’s folder. WordPress will fall back to a default theme, such as Twenty Twenty-Five, if one is installed. Then log in and reactivate your old theme normally. - Via WP-CLI: If your host gives you SSH access, run
wp theme activate your-old-theme-folder. The WP-CLI documentation covers the command in full. - Via phpMyAdmin: Open the
wp_optionstable. Change thetemplateandstylesheetvalues to your old theme’s folder name. If you use a child theme,templateis the parent folder andstylesheetis the child folder.
wp_, so look for the table ending in _options. Back up the database before editing anything there.Bottom Line
Learning how to change a WordPress theme without breaking your site isn’t about the switch itself. Activating a theme takes one click. The real work happens before and after it.
Your content is safe no matter what. The risk lies in theme-specific settings, code, and features. Copy your CSS and code snippets first. Inventory any shortcodes or custom post types. Then test everything somewhere visitors can’t see.
My verdict: use a staging site for any site with real traffic, and always for a WooCommerce store. Live Preview plus a direct switch is fine only for brand-new sites with little content. Whatever method you choose, take a fresh backup and keep your old theme installed until you’re confident.
If you’re still choosing a new theme, pick one that keeps features like sliders, portfolios, and page building in separate plugins. That way, your next switch won’t strand any content. Compare lightweight options in our guide to the best WordPress themes, or see how two popular picks stack up in Astra vs. GeneratePress.
Set Up Staging With WP Staging Pro →
Frequently Asked Questions
Will changing my WordPress theme delete my posts and pages?
Does changing a WordPress theme affect SEO?
Can I change my WordPress theme without going live?
How long does it take to change a WordPress theme?
What happens to my widgets when I change themes?
Should I delete my old WordPress theme after switching?
Can I switch back to my old theme later?
References
-
WordPress.org
Requirements
-
WP Staging
WordPress.org Plugin Directory (v4.15.1)
-
WordPress Developer Resources
wp_get_custom_css()
-
WordPress Developer Resources
get_theme_mods()
-
WordPress.org Documentation
Manage WordPress Widgets
-
Theme Switcha
WordPress.org Plugin Directory
-
WordPress.org Documentation
Recovery Mode
WP Essentials Hub — Your Complete WordPress Essentials Hub
I’m Shamim Sarker, the founder and lead reviewer at WP Essentials Hub — a dedicated WordPress toolkit review site where I help website owners, bloggers, and developers find the right tools to build, grow, and secure their WordPress sites.
With 8+ years of hands-on WordPress experience, I’ve personally built, tested, and troubleshot hundreds of websites. I cover themes, page builders, plugins, hosting, domains, coupons, and deals — all tested on live WordPress sites with my own money. No paid placements. No vendor influence. Just real testing and real results.